
You can spot
a little gap
It's too near:
check the thickness
with your fingers!
Dangerous
for the bed
This calibration is the first one to do, because it's mandatory to make a print stick on the build plate.
This calibration is made to do the fine tuning. Please level roughly the printer before: move your nozzle to 0.2mm, then you must be able to move a paper between the nozzle and the plater, but you have to be able to feel the nozzle touching it. With that, you should be able to level the bed with a ~0.1mm precision.
First, select your printer and your default print profile, with the filament profile for a filament you have. Note that this works with your first extruder if you have multiple ones.
When clicking on the Generate button, the program will create and slice the test print. You have to send it to your printer and print it. After the print end, check the result of each corners and the middle one against the photo below. You will have to tune your printer/firmware to correct the height if needed.
Read the notes and advices below for more informations.
|
|
|
|
|
|
|
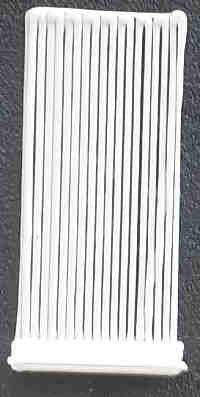
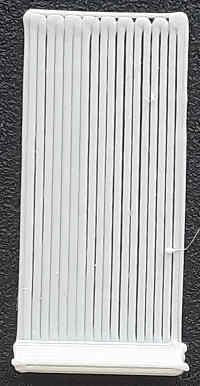
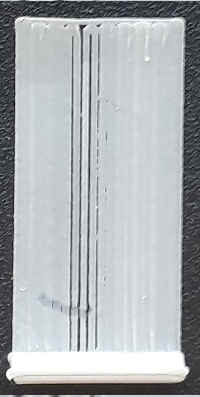
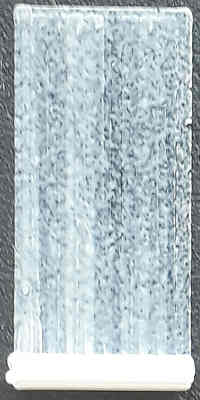
| Too far away | Too far | Too far: You can spot a little gap |
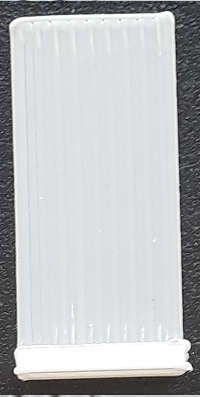
perfect | Too near | Trap! It's too near: check the thickness with your fingers! |
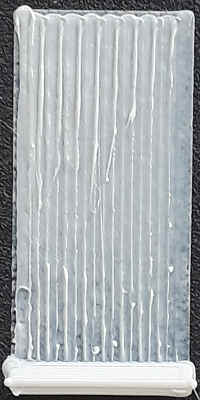
Far too near Dangerous for the bed |
If your printer has screws, use them to lift or drop the bed below the patch that need an adjust. Don't forget to print the test after the adjust to verify the compensation. Be careful, most of the time, a half-turn means 0.2mm of height, which equals (often) to the height of the first layer, so if you lift the bed, never turn more than that and prefer adjusting by quarter-turn at most.
If it doesn’t, you have to use the software or modify the firmware configuration, refer to the manual of your printer.
If your filament have a hard time sticking to the bed, you can try to :
This test use your current first layer height, but you may want to increase it up to 80% of your nozzle height (before using 'generate') if it's the first time you level your bed, to reduce the risk of a nozzle crash.
After the filament flow calibration, if it appears that the flow was very wrong, you may want to redo this calibration just after.
Most of the calibrations need to done is the right order. This one is the first to do. But ou have to have a "good enough" extruder calibration: when you ask for 100mm of filament, that's ~ what the extruder has to scroll into the nozzle.
This test set the setting "complete individual objects" to true, so you may want to reset your print settigns afterwards
Licence for models used for this calibration test: CC BY-SA 3.0