
 SMusatov
f505bc06ed
v1.0
SMusatov
f505bc06ed
v1.0
|
1 year ago | |
|---|---|---|
| .. | ||
| Configuration.h | 1 year ago | |
| Configuration_adv.h | 1 year ago | |
| README.md | 1 year ago | |
README.md
AnyCubic Predator Notes
- At this time, this version is not supported by the stock bootloader as an SD card update.
- Special thanks to Korbinian Heel [@inib].
- Special thanks to Slava Novgorodov [@Slava N] for sharing and making the video of the direct installation method.
- Special thanks to Sebastian Hernandez [@SXHXC] for his fork and doing all the work.
Backing Up the Firmware
Watch the video below for detailed instructions on the whole process. It is recommended to take the time to make a backup of the firmware currently installed on the board, in case you decide you want to go back to the factory-installed version.
Flashing the Firmware
1. Build Marlin
Use these example config files (adjusted to your needs) and build Marlin as usual.
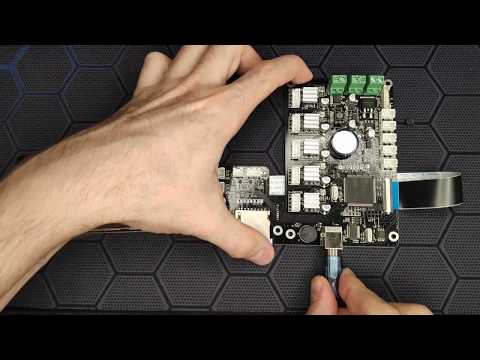
2. Prepare the Board
- Turn off the printer and disconnect AC power.
- SW1 routes power to the board from the USB port or from an external 24V source. Move jumper SW1 to USB.
- JP1 is connected to the BOOT0 pin which blocks programming. Remove the JP1 jumper.
3. Get STM32 Flasher
Download the STM32 Flasher software at the ST Micro download page. Use STM32 Flasher to flash your Marlin binary file to the board following the procedure shown in the video.
4. Final Steps
- Put the SW1 and JP1 jumpers back in their original positions.
- That's it!
Restoring from Backup
- If you made the backup as described in the video just flash that file to restore the firmware to its previous state.